 Putting
on a Practice Uniform Putting
on a Practice Uniform
There are three garments used for everyday sword practice. These are
the keikogi (practice top), obi (belt), and hakama (pleated pants). These
must be put on properly and the details may change based on the style of
swordsmanship practiced. The following defines the proper way they should
be worn in the Konjaku Kioi
Toyama Ryu Dojo. Unranked students should have blue keikogi and hakama.
Ranked students may wear black keikogi and hakama. Obi may be any color.
Students who are sandan and above should also have formal uniforms. Tabi
may also be worn during practice.
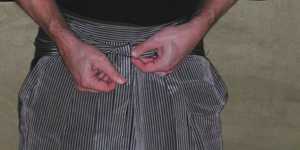
The keikogi is put on first. It is important to have the two sides even
and wrap it tightly around the body.


- The sides are grasped at the waist and pulled forward making sure the
two sides are even.
- The right side is wrapped around the waist followed by the left side.
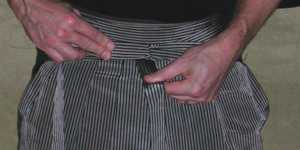
- The keikogi is held in place with the right hand while the left is used
to wrap the obi around the waist. Any straps should be tied after putting
the obi on.
Most men wear the obi just under the hipbones while most women wear the obi
above the hipbones. A kaku obi (3.5 inch wide traditional obi) is recommended.
The obi must be tight enough to keep the katana in place but not too tight to
make saya biki (drawing saya back off of the katana) difficult.
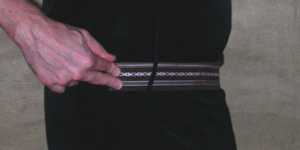
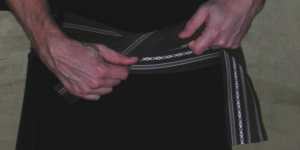
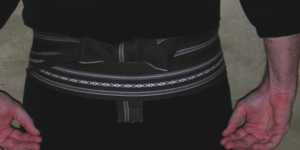
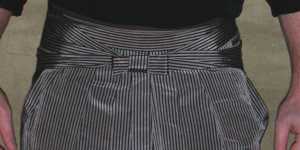
- The first foot of the obi is folded over with the open side oriented
downward.
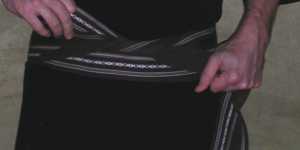
- The top of the folded section of the obi is aligned with the top of the
obi as it is wrapped around the waist three times
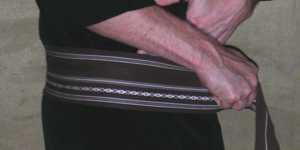
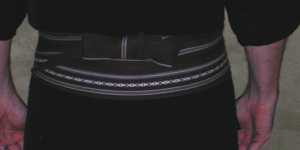
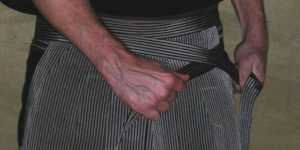
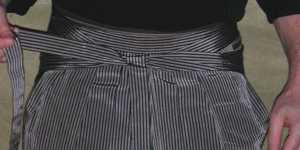
- The remaining section of obi is folded over with the open side upward.
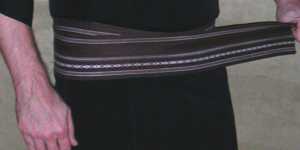
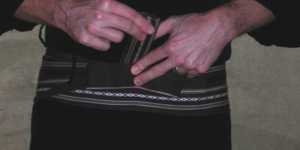
- The starting end of the obi is pulled out, wrapped around the remaining
section, and pulled tight.
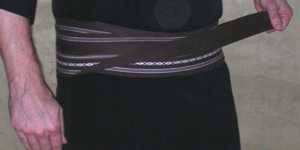
- The remaining section of the obi is rolled up into a 6-inch long section
and centered on the knot.
- The starting section of the obi is wrapped over the top of the folded
section and threaded under the obi around the waist.
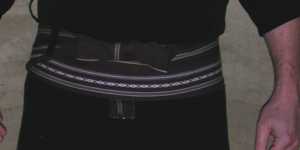
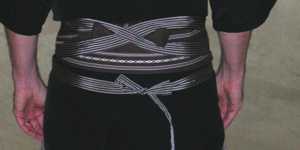
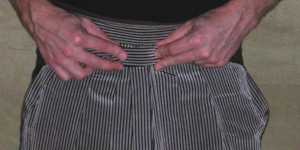
- The knot is then rotated clock-wise around the body to the back and the
loose tail is tucked in under the obi.
Problems:
- A standard iaido obi may be too thin and can be tied without folding in
steps 1 and 3.
- If your obi is too short only wrap it around the waist two times in step
2.
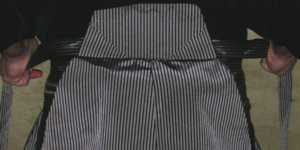
The hakama should just touch the top of the feet. Himo (straps)
should be snug and their placement is important. Having a properly tied
obi knot in the back and keeping the rear himo tight will keep the koshi-ita
(rigid board section) in the right place.
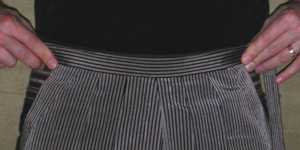
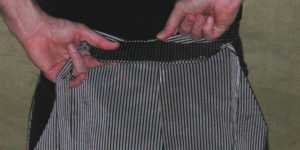
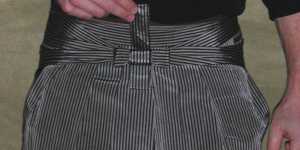
- The front of the hakama is aligned with the top of the obi.
- The front straps are wrapped around the body and are aligned along the
top of the obi.
- The straps cross over the top of the knot in the obi and return to the
front at the bottom of the obi.
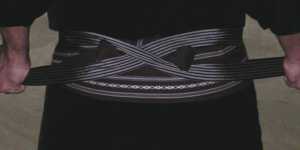
- The strap coming from the right side is wrapped over the strap from the
left side over the front of the left hip.
- The straps should be long enough to return to the back and tie below the
obi. These can be tied with a square knot or bow.


- The koshi-ita (rigid board section) of the hakama is worn above the knot
in the obi. If a tab is present, it is put under the obi to keep the rigid
section in place.
- The rear straps are wrapped around the body and slipped under the front
straps. They should cross below the front straps with the strap going to
the right below the strap going to the left.
- The strap going to the right is wrapped over and then around all the
straps in the center. It should now be hanging down in the center of the
hakama.

- The strap going to the left is folded over and the strap going down is
wrapped around all the straps a second time.
- The strap going to the left is rolled into a three-inch long section and
positioned in the center.
- The strap going down is then wrapped around this section and all the
straps.
- This strap is then wrapped around once more, but the end is left hanging
out of the top. The bottom loop should be about 1.5 inches long.
- The top is then tucked in creating a loop matching the length of the
bottom loop.

Problems:
- If the front straps are not long enough for step 5 they must be tied in
the front with a square knot. The excess straps should be wrapped around
the tied strap.
|